Work Smarter with PDFelement User Guide
How to Add Stamps in PDF on Mac
Stamp annotations help indicate the status of PDF pages. There are some built-in stamps available in PDFelement for Mac, and you can also create your signature or use images as the stamps. Moreover, PDFelement allows you to customize your stamp.
1. Create Built-in Stamp
- Clicking the "Markup" button on the Main Toolbar, and more tools will be available. Click the "Stamps" option, and then you can select a built-in stamp to add to any desired location on the PDF page.
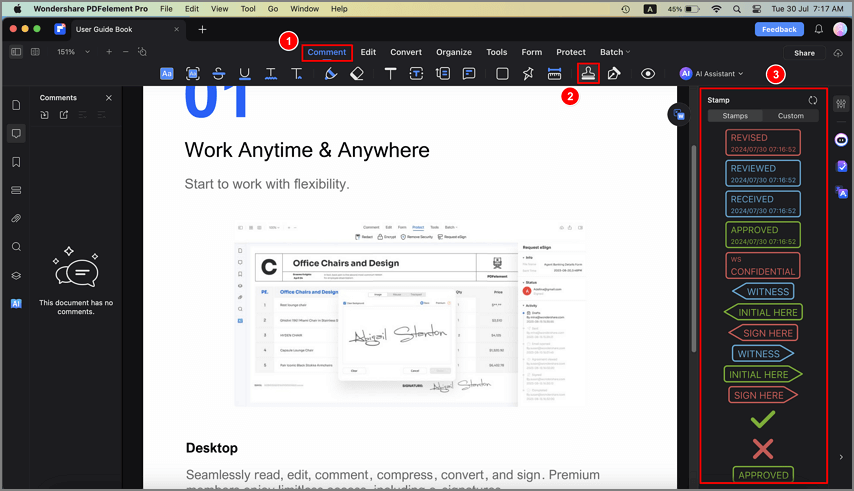
Add stamp to PDF
- You can drag a corner handle to resize a stamp. To move a stamp, drag it to a new location, or use the arrow keys for precise movements.
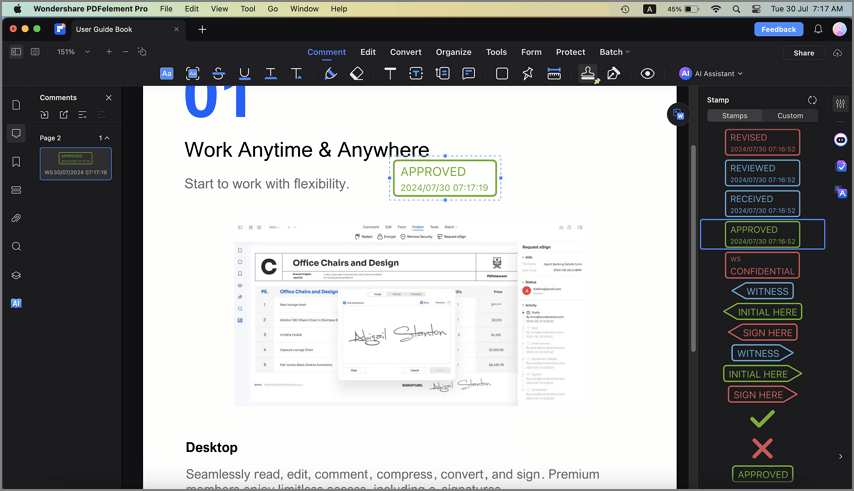
Resize stamp
2. Create Custom Stamp
- Under the "Markup" tab, click the "Stamps" icon, and then select the "Custom" option. Next, you can click the "Create" button to customize a new stamp, or click "Import" to upload an image of the stamp you've already created.
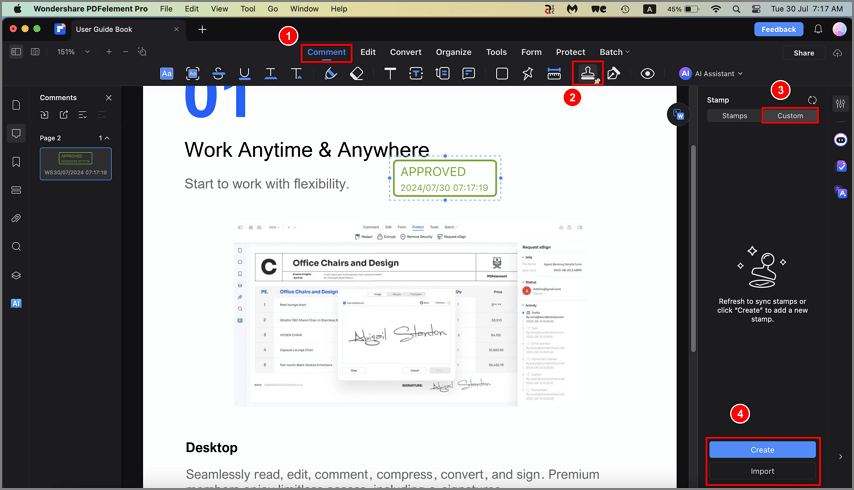
Create custom stamp
- If you choose to create a stamp, you can customize it in the pop-up "Create Stamp" window. Then, enter the text in the "Sample Text" box, and at the same time, you can preview the stamp you created in the "PREVIEW" window. In addition, you can also change the shape and color of the stamp, and customize the format of the Date and Time. Finally, click "Done" and put the created stamp on your desired location.
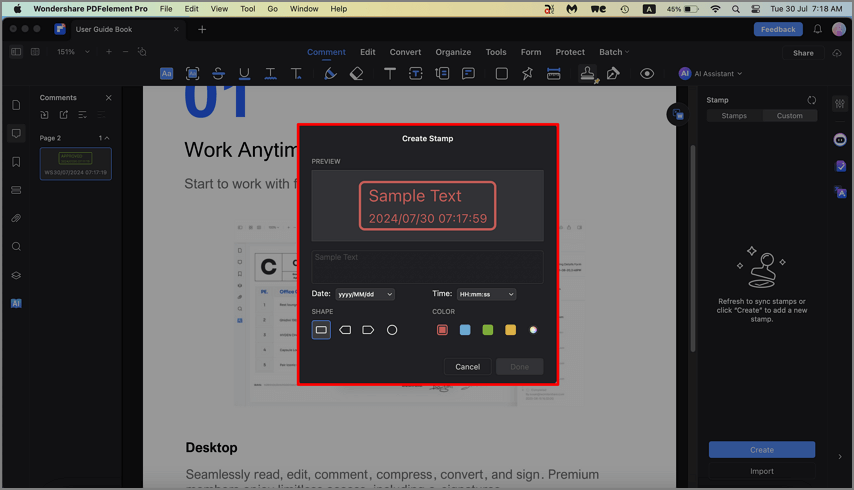
Create custom stamp
3. Create Signature
- PDFelement for Mac allows you to create your signature as the stamp to add to the PDF file. Clicking "Markup" > "Signature" > "Create Signature".
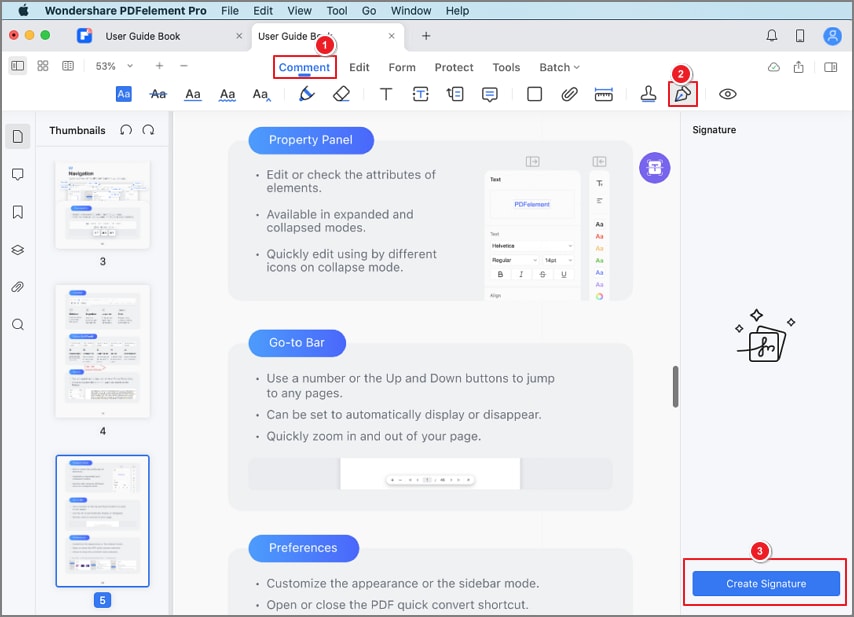
Add signature
- Add your signature in the pop-up window by uploading an image of your signature, or drawing your signature in the field with the mouse or on the trackpad.
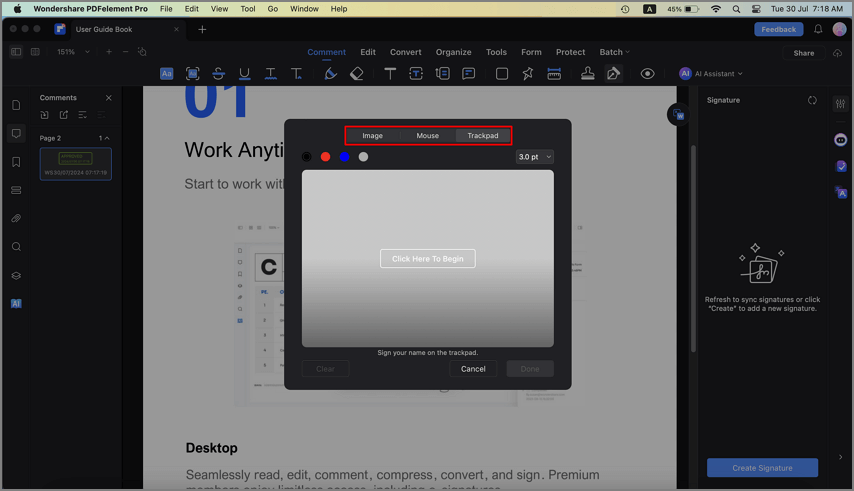
Add signature
